TL;DR: Most shared hosts make Laravel painful or impossible without SSH. Here is how to deploy a full Laravel app with a Filament admin dashboard on FireVM shared hosting, entirely through the browser, start to finish.
This walkthrough uses Filament, a popular admin panel framework for Laravel, as the example app. We picked it because its demo ships with a real admin dashboard, a real database, sample products, and images already wired up, so the moment the install finishes, you can see everything working, no blank starter page in sight.
Why Laravel is usually a pain on shared hosting
Most shared hosting plans weren’t built with Laravel in mind. Composer usually isn’t exposed in the panel, there’s no clean way to point the document root at Laravel’s public folder, and the moment you need to run an artisan command, you’re told to drop into SSH, something a lot of shared hosting plans don’t even give you.
Here’s what that typically looks like, compared to running Laravel on FireVM:
On most shared hosts (what usually goes wrong)
- No Composer access through the panel, install manually or not at all
- Document root has to be manually repointed to
public, if the panel allows it at all - Running migrations or seeders means SSH, which many shared plans don’t include
- Deploying updates means re-uploading files via FTP or SSH each time
- Environment variables are edited by hand in a
.envfile over FTP - Queue workers and scheduled jobs either don’t run at all, or depend on unreliable cron setups, since there’s no way to keep a persistent process alive
- Laravel support, where it exists at all, usually means jumping to a VPS, at several times the cost of shared hosting
On FireVM shared web hosting (everything else, taken care of)
- Laravel apps install directly from a Git repository with one click, Composer runs automatically
- Document root and app structure are set up correctly from the start
- Migrations, seeders, and any artisan command run from a UI tab, no terminal needed
- SSH terminal access is included too, so it’s there if you ever want it, just not required
- Git-based deploys mean pushing an update is a redeploy, not a re-upload
- Environment variables are edited from a dashboard, saved and applied without touching a file
- Queue workers run as actual persistent processes, and scheduled tasks run reliably, so background jobs and the scheduler just work
- Laravel runs on the Business plan and above, no need to move to a VPS just to get a working setup
- A WordPress site can run on the main domain. A Laravel app can run on a subdomain. Another Laravel or WordPress site can run on a completely separate domain. All on the same account, at the same time.
Watch it happen, then do it yourself
Here’s a full walkthrough deploying the Filament demo app, a real Laravel app with an admin dashboard, sample products, and images, done entirely in the browser.
The steps below follow the exact same sequence shown in the video above, so you can follow along side by side if you’d rather watch than read.
Installing Filament, step by step
Step 1: Create a subdomain and enable SSL
Create a subdomain in FireVM’s control panel for your Laravel app, something like laravel-demo. Then head to Hosting & DNS → SSL/TLS support and issue a free Let’s Encrypt certificate. This secures your site with HTTPS before we install anything.
Step 2: Install Filament via Git
Go to Get Started, click Laravel, and choose Install from remote repository. Paste in the GitHub URL for the Filament demo:
https://github.com/filamentphp/demo.gitClick Install. This one click handles cloning the code and setting up the base configuration.
Step 3: Build the frontend
Open the Node.js tab, type install, and run it. Once that finishes, type run-script build and run that too. This compiles the styling and JavaScript the app needs to actually look right.
Step 4: Set up the database
In Files, check that database.sqlite exists inside the database folder. If it’s missing, create an empty file with that name.
Then, in the Artisan tab, run:
migrate --forceThis builds out the tables. After that, run:
db:seed --forceThis fills the app with demo data. It takes a few minutes, counts climbing in the output as it works, so there’s nothing to do but let it run. You may see a flash of “Request failed with status code 504” near the top of the page partway through. Ignore it, that’s just FireVM’s control panel timing out on a long request, not the seeder failing. The seeder is actually done when the command box becomes editable again.
Finally, run:
storage:linkThis makes sure product images display correctly.
Step 5: Fix the app URL
Open the Dashboard tab, click Environment Variables, and edit the file. Change the APP_URL line to your actual subdomain address, for example https://laravel-demo.inspirevilla.com, then save.
Head back to the Artisan tab and run:
config:clearto apply the change.
Installation complete
Visit /login on your subdomain and sign in with:
- URL: https://laravel-demo.inspirevilla.com
- Email: [email protected]
- Password: password (this comes from the Filament demo’s own seeder, in a real app you’d set your own password during setup)
Products, images, and dashboard totals should all display correctly.
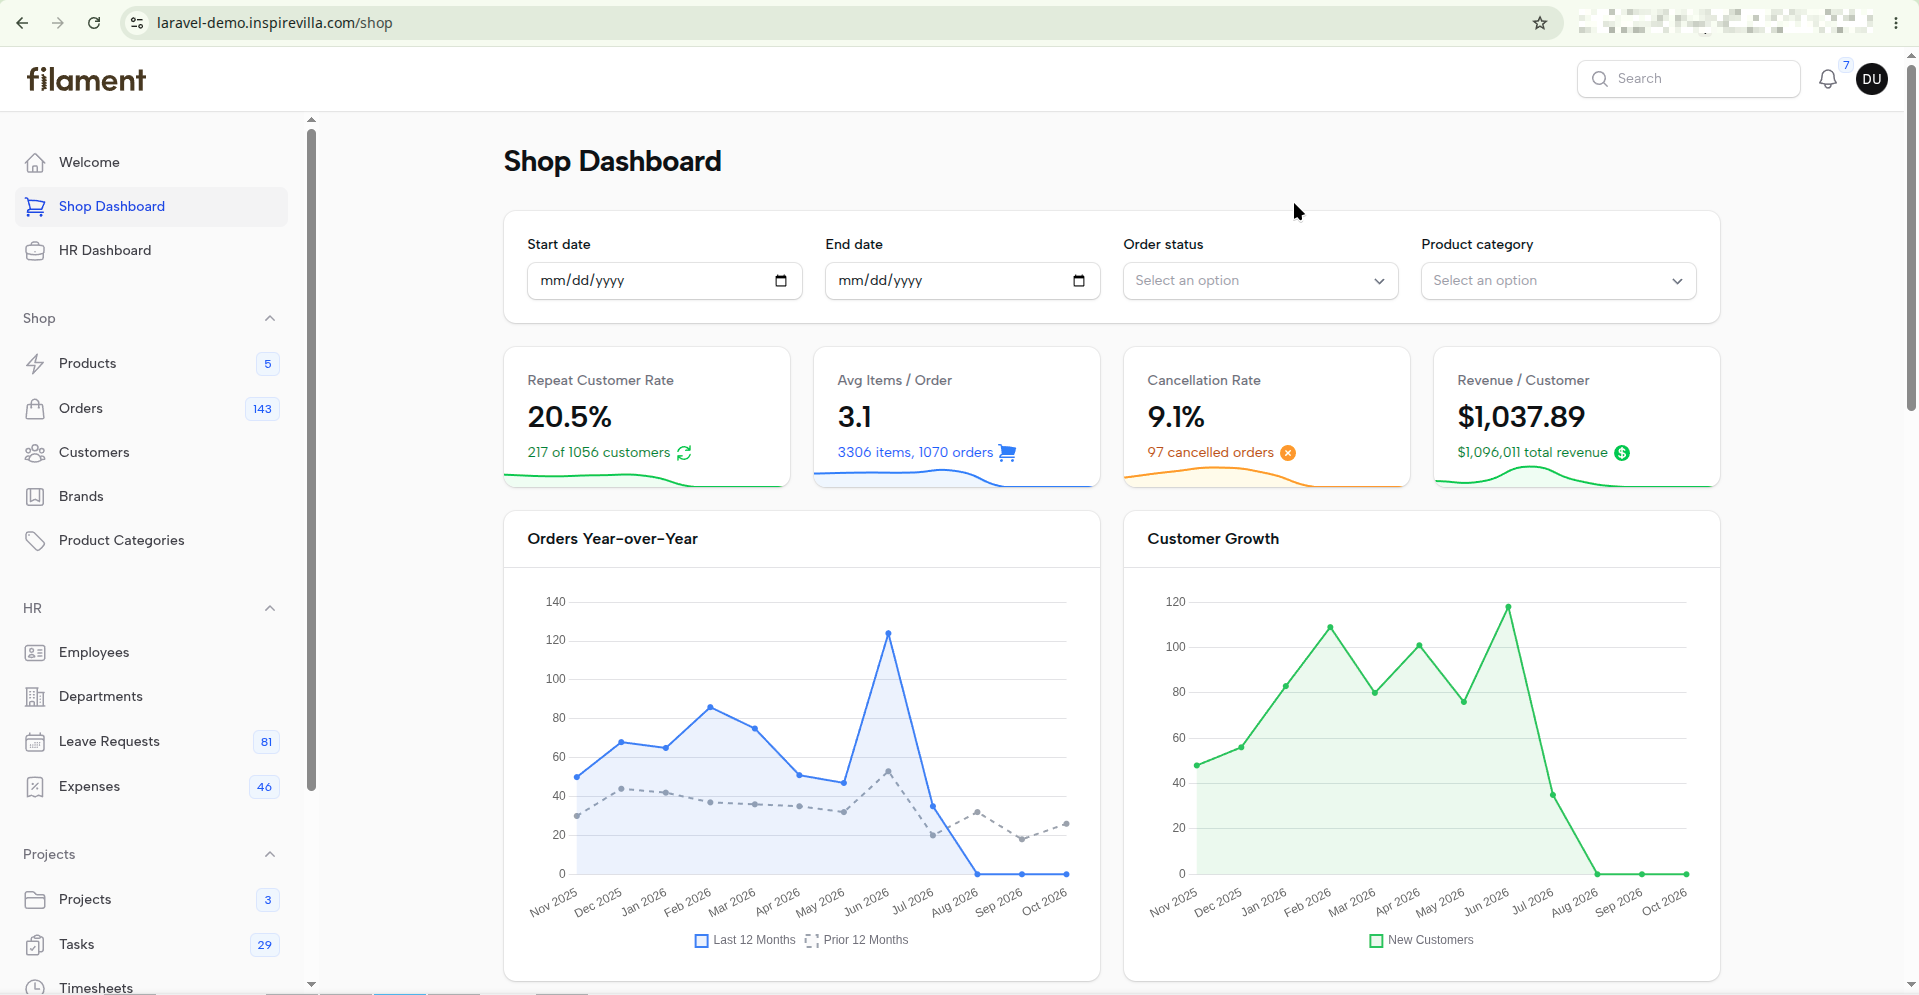
From subdomain to a working admin panel, the whole build happened in the browser, no SSH, no terminal.
Prefer the terminal? Here’s the SSH version
Everything above runs through FireVM’s control panel UI, but Business and above plans include full SSH access too. If you’d rather work from the terminal, here’s the same install as a command sequence. The UI version handles a few things automatically behind the scenes, like restarting the app after environment changes, so the SSH version adds one extra step to cover that manually.
# 1. Navigate to your subdomain's document root
cd ~/laravel-demo.yourdomain.com

# 2. Clone the Filament demo repo directly into this folder
git clone https://github.com/filamentphp/demo.git .

# 3. Install PHP dependencies via Composer
composer install --no-dev --optimize-autoloader

# 4. Copy the example env file and generate an app key
cp .env.example .env
php artisan key:generate

# 5. Install Node dependencies and build the frontend
npm install
npm run build

# 6. Create the SQLite database file if it doesn't exist
touch database/database.sqlite

# 7. Run migrations
php artisan migrate --force

# 8. Seed demo data (takes a few minutes, same as the UI version)
php artisan db:seed --force

# 9. Link storage so images display correctly
php artisan storage:link

# 10. Set the correct APP_URL in .env, then clear config cache
sed -i 's|^APP_URL=.*|APP_URL=https://laravel-demo.yourdomain.com|' .env
php artisan config:clear

# 11. Tell Passenger to reload the app
mkdir -p tmp
touch tmp/restart.txt
Double-check your document root path and active PHP version before running this, both are specific to your setup.
What’s next
FireVM’s Business plan or above runs Laravel. Anything below that won’t give you Composer, Git deploys, or queue worker support for Laravel apps.
If you’re running client sites rather than just your own, the Agency plan is the better fit. It gives each client their own isolated account with a separate login, so you can hand off access without exposing anything else on your hosting.
If your app genuinely needs more than shared web hosting can offer, heavier traffic, custom server-level configuration, or full root access, FireVM’s VPS hosting is there too. And if you ever outgrow VPS as well, FireVM’s dedicated servers are there for when you need a machine entirely to yourself.