
TL;DR: Most shared hosting plans can’t run a real Ruby on Rails app. There’s no bundler, no rake tasks, and no sane way to deploy without SSH access. FireVM’s shared hosting changes that, no terminal, no command line.
In this guide, we’ll deploy Redmine, a popular open-source Ruby on Rails project management app, entirely through the browser using the FireVM control panel.
Why Ruby is usually a pain on shared hosting
Most shared hosting plans weren’t built with Ruby on Rails in mind. There’s no bundler exposed in the panel, no clean way to run rake tasks, and the moment something breaks, you’re told to drop into SSH, something a lot of shared hosting plans don’t even give you.
Here’s what that typically looks like, compared to running Ruby on FireVM.
On most shared hosts (what usually goes wrong)
- No Ruby runtime exposed through the panel at all, or bolted on as a fragile CGI setup
- No Bundler support, so gems with native extensions fail with header file errors
- Rake tasks mean dropping into SSH, if you even have shell access
- Git deploys mean manually pulling and rebuilding over SSH every time
- Passenger/CageFS quirks silently break app spawning with no useful error logs
- Database config files (
database.yml) edited by hand, easy to get wrong - Ruby support, where it exists at all, usually means paying several times the cost of shared hosting for a VPS
On FireVM shared hosting (everything else, taken care of)
- Ruby runs as a real, persistent process, with gems and native extensions installing properly
- Bundler and rake tasks run directly from the panel, no shell needed
- Git-based deploys, including branch switching, handled through the UI
- Application startup, restarts, and environment variables managed from a dashboard
- SSH access is included too, if you’d rather work from the terminal
- All of this runs on the same shared hosting plan, no VPS required
Here’s a full walkthrough deploying Redmine, a real Ruby on Rails app, entirely in the browser. If you’d rather work from an SSH terminal instead of the Web UI, that’s covered too, right after the UI-based walkthrough.
Installing Redmine, step by step
Step 1: Create a subdomain and enable SSL
In the FireVM control panel, go to Websites & Domains → Add Subdomain. Give it a name, we’re using rails-demo. Then enable SSL through Let’s Encrypt. This secures your site with HTTPS before we install anything.
Step 2: Enable Ruby
From the subdomain’s Get Started tab, click Ruby, then Enable Ruby. Confirm the Ruby version shown matches what Redmine needs, more on version compatibility below.
Step 3: Deploy Redmine via Git
From Get Started, click Deploy using Git → Add Repository.
Repository URL: https://github.com/redmine/redmine.git
Repository name: redmine.git
Deployment mode: Automatic
Server path: /rails-demo.inspirevilla.com
Leave the Username and Password fields blank. If your browser autofills these and causes a “could not read Username” error, use an incognito window instead.
Click Create. The clone can take up to about 10 minutes.
If it looks stuck, refresh the page rather than retrying, the clone is likely still running in the background.
On the repository’s management page, switch the Branch dropdown to 6.1-stable, then click Deploy now.
Step 4: Set the document root
Go to Hosting & DNS → Hosting Settings. The Document root field may show a stale or incorrect default. Manually set it to rails-demo.inspirevilla.com/public and save. Redmine’s public assets live in that folder, and the app won’t load correctly if the document root points anywhere else.
Step 5: Configure the database
In File Manager, go to config/ and create a new file called database.yml:
production:
  adapter: sqlite3
  database: db/redmine.sqlite3
Step 6: Install gems and run setup tasks
From the Ruby panel, click Bundle install. This installs all the gems Redmine needs, including ones with native extensions.
Then, from the Ruby panel’s rake task runner, run each of these one at a time:
generate_secret_tokenThis task shows no visible output, it just spins and returns to the panel. That’s normal, not a failure. Confirm it worked by checking that
config/initializers/secret_token.rbwas created in File Manager.
db:migrateREDMINE_LANG=en redmine:load_default_dataBoth of these show live output normally as they run.
Step 7: Verify
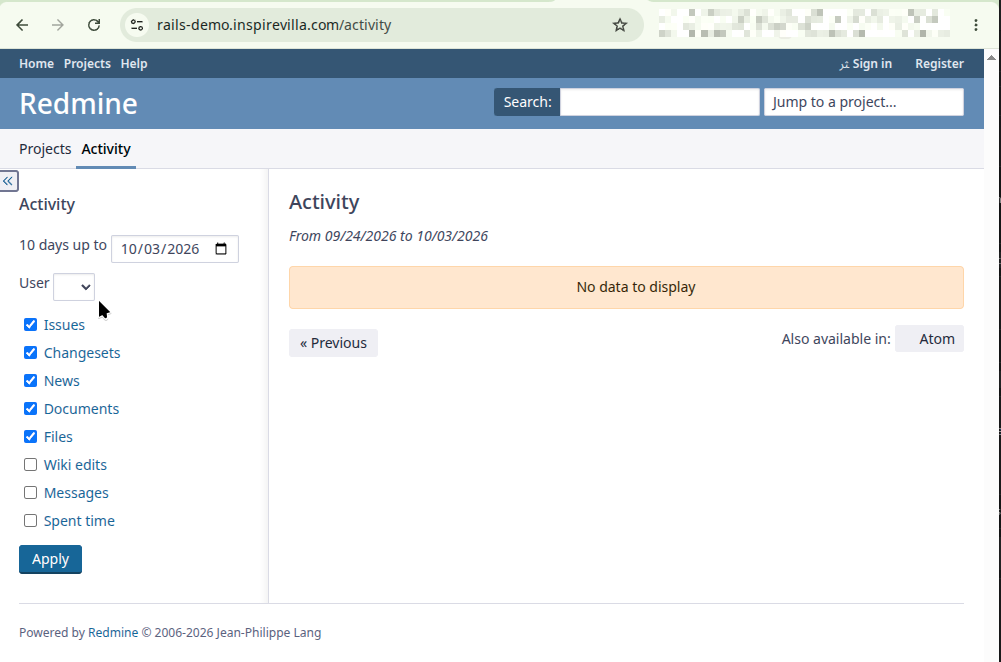
Visit your subdomain, for example http://rails-demo.inspirevilla.com. The Redmine home page should load. Log in with admin / admin, and set a new password when prompted.
Known gotchas
A few things worth knowing before you hit them yourself.
- Removing a subdomain doesn’t delete its files. If you remove a subdomain and recreate it with the same name, check File Manager afterward and delete any leftover folder from the old deployment. Old files and configs otherwise persist and conflict with the fresh deploy.
- The document root field can default to a stale or wrong value, not necessarily the correct subdomain path. Always check and set it explicitly rather than assuming it’s correct, as covered in Step 4.
- Check Ruby version compatibility against Redmine’s supported range before picking a branch. Redmine 5.1-stable needs Ruby 3.2 or earlier; 6.1-stable needs Ruby 3.2 through 3.4.
- Domain naming convention: this guide uses
rails-demorather thanruby-demo, matching how developers typically name these subdomains, even though the panel’s button is labeled “Ruby.”
Prefer the terminal? Here’s the SSH version
Everything above runs through FireVM’s control panel UI, but Developer and above plans include full SSH access too. If you’d rather work from the terminal, here’s the same install as a command sequence.
# 1. Navigate to your subdomain's document root
cd ~/rails-demo.inspirevilla.com

# 2. Clone Redmine directly into this folder
git clone https://github.com/redmine/redmine.git .
git checkout 6.1-stable

# 3. Create the database config
nano config/database.yml
# add:
# production:
#   adapter: sqlite3
#   database: db/redmine.sqlite3

# 4. Install gems
bundle install

# 5. Generate the secret token
RAILS_ENV=production bin/rails generate_secret_token

# 6. Run migrations
RAILS_ENV=production bin/rails db:migrate

# 7. Load default data
RAILS_ENV=production REDMINE_LANG=en bin/rails redmine:load_default_data

# 8. Tell Passenger to reload the app
mkdir -p tmp
touch tmp/restart.txt
Double-check your document root path and Ruby version before running this, both are specific to your setup.
What’s next
FireVM’s Developer plan runs Ruby apps like this. Anything below that won’t give you Bundler, Git deploys, or rake task support for Ruby apps.
If you’re running client sites rather than just your own, the Agency plan is the better fit. It gives each client their own isolated account with a separate login, so you can hand off access without exposing anything else on your hosting.
If your app genuinely needs more than shared web hosting can offer, heavier traffic, custom server-level configuration, or full root access, FireVM’s VPS hosting is there too. And if you ever outgrow VPS as well, FireVM’s dedicated servers are there for when you need a machine entirely to yourself.