TL;DR: Most shared hosting plans can’t run a modern Node.js app. There’s no build pipeline, no process manager, and no way to run
npm installwithout SSH access. FireVM’s shared hosting changes that, no terminal, no command line.
In this guide, we’ll deploy TailAdmin, a free Next.js admin dashboard, entirely through the browser using the FireVM control panel. Next.js runs on Node.js, so this walkthrough doubles as a real-world demo of the server’s Node.js capability: a full build pipeline, npm, and live process management, not just a static site.
Why Node.js is usually a pain on shared hosting
Most shared hosting plans weren’t built with Node.js in mind. There’s no way to run a build, no process manager to keep your app alive, and no sane way to deploy changes without SSH.
Here’s what that typically looks like, compared to running Node.js on FireVM.
On most shared hosts (what usually goes wrong)
- No Node.js runtime exposed through the panel at all, or it’s bolted on as a CGI/FastCGI hack
- No
npm installor build step without shell access - Apps served through a request-based proxy that restarts on every request, so long-lived connections and WebSockets don’t work
- No process manager, so a crashed app just stays down until someone notices
- Git deploys mean manually pulling and rebuilding over SSH every time
- Environment variables set by hand, often lost on redeploy
- Node.js support, where it exists at all, usually means paying several times the cost of shared hosting for a VPS
On FireVM shared hosting (everything else, taken care of)
- Node.js runs as a real, persistent process, not a proxy hack that restarts
npm installand build scripts run directly from the panel, no shell needed- Git-based deploys with configurable post-deploy actions, push and it builds
- Application startup file and environment variables managed from a dashboard
- WebSockets and long-held connections work properly since the process stays alive
- SSH access is included too, if you’d rather work from the terminal
- All of this runs on the same shared hosting plan, no VPS required
Watch it happen, then do it yourself
Here’s a full walkthrough deploying the TailAdmin demo app, a real Next.js app with an admin dashboard, sample data, and charts, done entirely in the browser.
Watch this 5-minute walkthrough: Deploying TailAdmin on Next.js to FireVM shared hosting. The real setup takes about 20 minutes, most of it is just “build” wait-time.
The steps below follow the exact same sequence shown in the video above, so you can follow along side by side if you’d rather watch than read. If you’d rather work from an SSH terminal instead of the Web UI, that’s covered too, right after the UI-based walkthrough.
Installing TailAdmin, step by step
Step 1: Prepare the Subdomain
Create the subdomain
In the FireVM panel, go to Domains → Add a Subdomain. Give it a name (we’re using app) and confirm the document root, which the FireVM control panel sets automatically based on the subdomain name. This walkthrough uses a subdomain, but the same steps work just as well on a full domain name, if that’s what your project needs.
Enable SSL
Open Hosting Settings for the new subdomain and find SSL/TLS support. Enable it, then select your existing Let’s Encrypt certificate from the Certificate dropdown. Save.
Remove the default index file
When a subdomain is created, the FireVM control panel drops a placeholder index.html file into its root. If you don’t delete this, it will load instead of your app once deployed. Open File Manager for the subdomain and delete index.html.
Enable Node.js
On the subdomain’s Get Started tab, click Node.js, then Enable Node.js. This turns on Node support for the subdomain and gives you access to the Node.js dashboard.
This gives you access to the Node.js dashboard for the subdomain, where the rest of the deployment settings live.
Step 2: Deploy the App via Git
Connect the repository
From the Get Started tab, click Deploy using Git. Choose Remote repository, since the code lives on GitHub rather than your own machine.
Enter the repository URL:
https://github.com/TailAdmin/free-nextjs-admin-dashboard.gitSet Deployment mode to Automatic, and confirm the Server path matches your subdomain’s directory.
Add the deploy actions
Check Enable additional deployment actions and paste in the following commands, one per line:
npm install
npm run build
cp -r public .next/standalone/
cp -r .next/static .next/standalone/.next/
This step can take a couple of minutes to finish. Wait for the console to confirm completion rather than assuming it’s done.
These install dependencies, build the app, and copy the static assets into place for the standalone output Next.js produces. Click Create. This pulls the repository files but doesn’t trigger a full deployment yet.
Step 3: Edit the Config Files
Two small edits are needed before the production build will work correctly.
Automate the post-build step
Open package.json in File Manager’s code editor and add a postbuild script:
"postbuild": "cp -r public .next/standalone/ && cp -r .next/static .next/standalone/.next/ && mkdir -p tmp && touch tmp/restart.txt",This copies the static assets automatically after every build and touches a restart file, so Passenger picks up the change without a manual restart.
Set standalone output
Open next.config.ts and add this line inside the config object:
output: 'standalone',This tells Next.js to bundle a self-contained server file, so Passenger can run the app directly instead of needing Next’s own dev server.
Step 4: Run the Production Build
Go to the Node.js dashboard and click Run script. Type build as the script name and click Run.
This step can take up to 10 minutes. The console may appear to hang with no visible output during that time, that’s normal, let it run while you sip some coffee 🙂
If nothing has happened after 20 minutes, something has likely gone wrong, a frozen browser tab or a network glitch are common culprits. In that case, click Run script again to restart the build from scratch.
This compiles the app into optimized static and server files, and the postbuild script you added in Step 3 runs automatically right after, copying the assets into place.
Step 5: Set the Startup File and Launch
Passenger is what actually runs your Node.js app behind the scenes, and by default it looks for a file called app.js, which doesn’t exist in a standalone Next.js build. Go back to the Node.js dashboard, open Application Startup File, and set it to:
.next/standalone/server.jsClick OK, then Restart App.
Launch the app
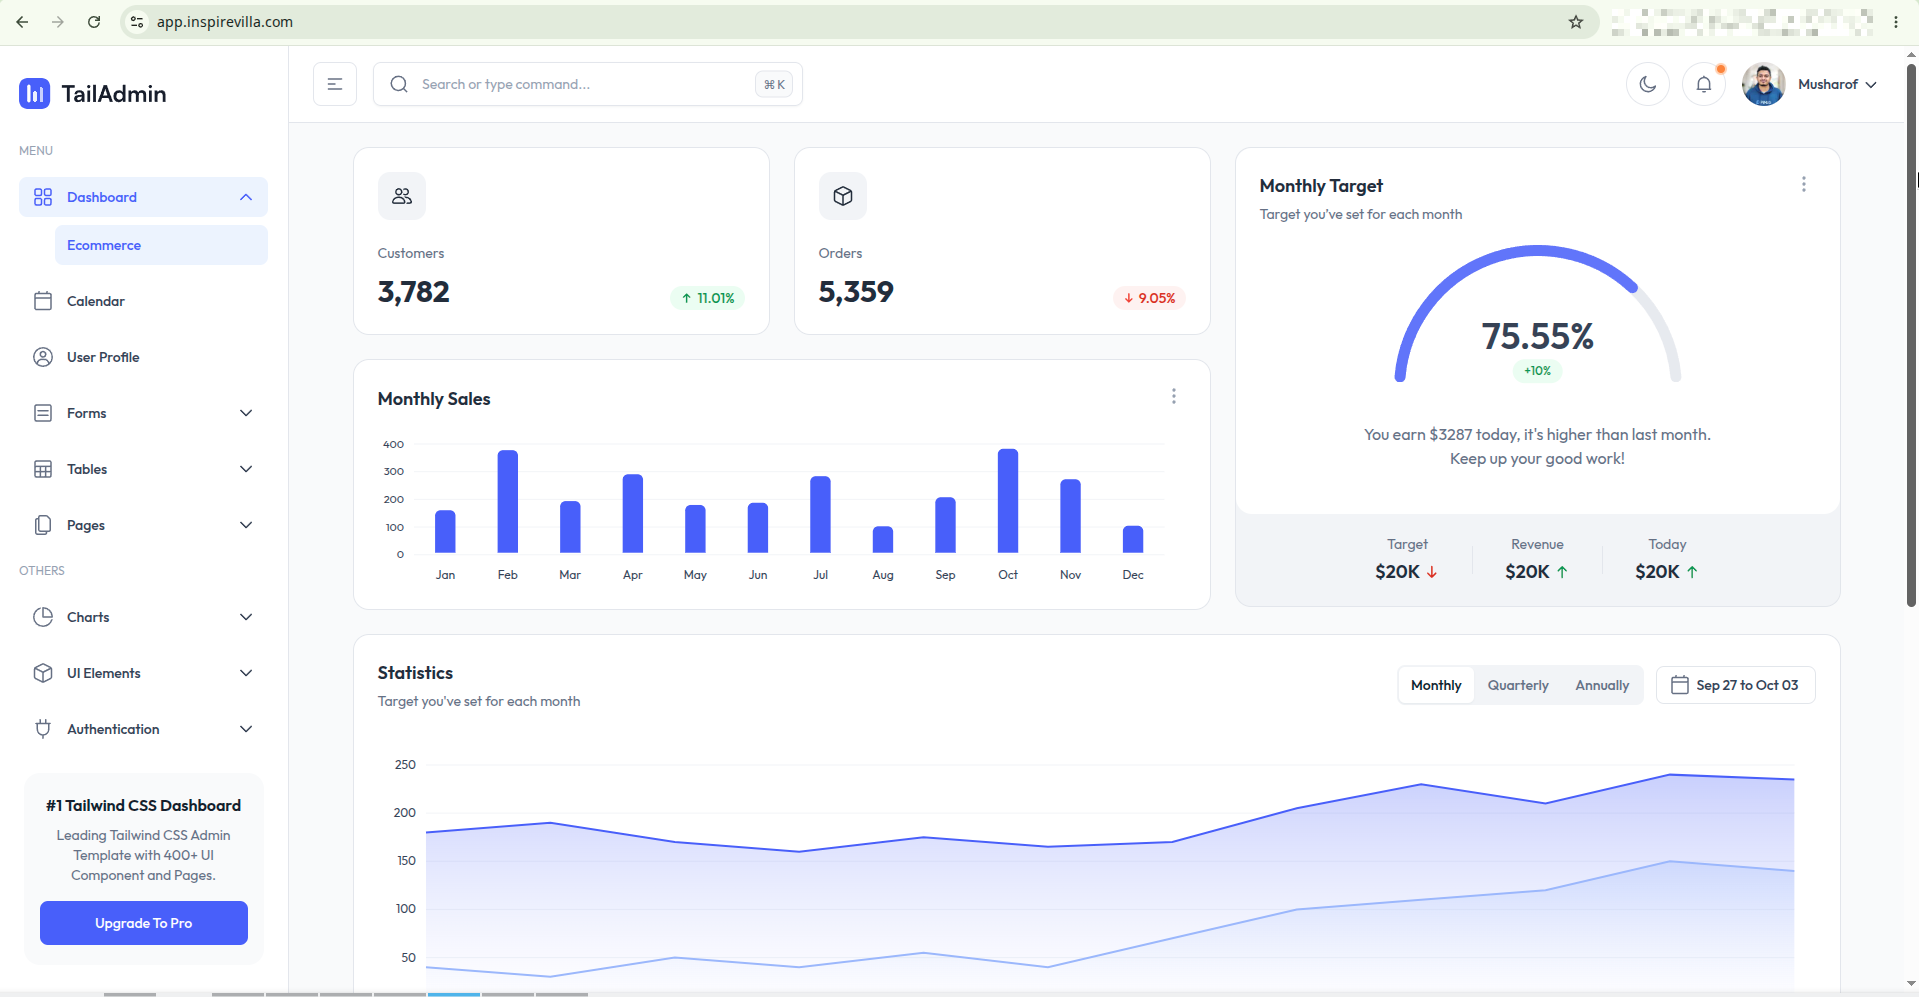
Visit your subdomain, for example https://app.inspirevilla.com. TailAdmin should now be live, fully deployed through the browser with no SSH session ever opened.
Prefer the terminal? Here’s the SSH version
Everything above runs through FireVM’s control panel UI, but Developer and above plans include full SSH access too. If you’d rather work from the terminal, here’s the same install as a command sequence. The UI version handles a few things automatically behind the scenes, like restarting the app after a rebuild, so the SSH version adds a couple of extra steps to cover that manually.
# 1. Navigate to your subdomain's document root
cd ~/app.inspirevilla.com

# 2. Clone the TailAdmin repo directly into this folder
git clone https://github.com/TailAdmin/free-nextjs-admin-dashboard.git .

# 3. Install npm dependencies
npm install

# 4. Edit package.json to add the postbuild script
nano package.json
# add: "postbuild": "cp -r public .next/standalone/ && cp -r .next/static .next/standalone/.next/ && mkdir -p tmp && touch tmp/restart.txt",

# 5. Edit next.config.ts to enable standalone output
nano next.config.ts
# add inside the config object: output: 'standalone',

# 6. Build the app
npm run build

# 7. Set the correct Node.js startup file via the panel
# Application Startup File: .next/standalone/server.js

# 8. Tell Passenger to reload the app
touch tmp/restart.txt
Double-check your document root path and Node.js version before running this, both are specific to your setup.
What’s next
FireVM’s Developer plan runs Node.js apps like this. Anything below that won’t give you Git deploys, npm, or process management for Node.js apps.
If you’re running client sites rather than just your own, the Agency plan is the better fit. It gives each client their own isolated account with a separate login, so you can hand off access without exposing anything else on your hosting.
If your app genuinely needs more than shared web hosting can offer, heavier traffic, custom server-level configuration, or full root access, FireVM’s VPS hosting is there too. And if you ever outgrow VPS as well, FireVM’s dedicated servers are there for when you need a machine entirely to yourself.